Bootstrap Grid Template
Intro
Bootstrap incorporates a highly effective mobile-first flexbox grid solution for building formats of any contours and sizes . It is simply built upon a 12 column structure and has numerous tiers, one for each and every media query variety. You can certainly utilize it using Sass mixins or else of the predefined classes.
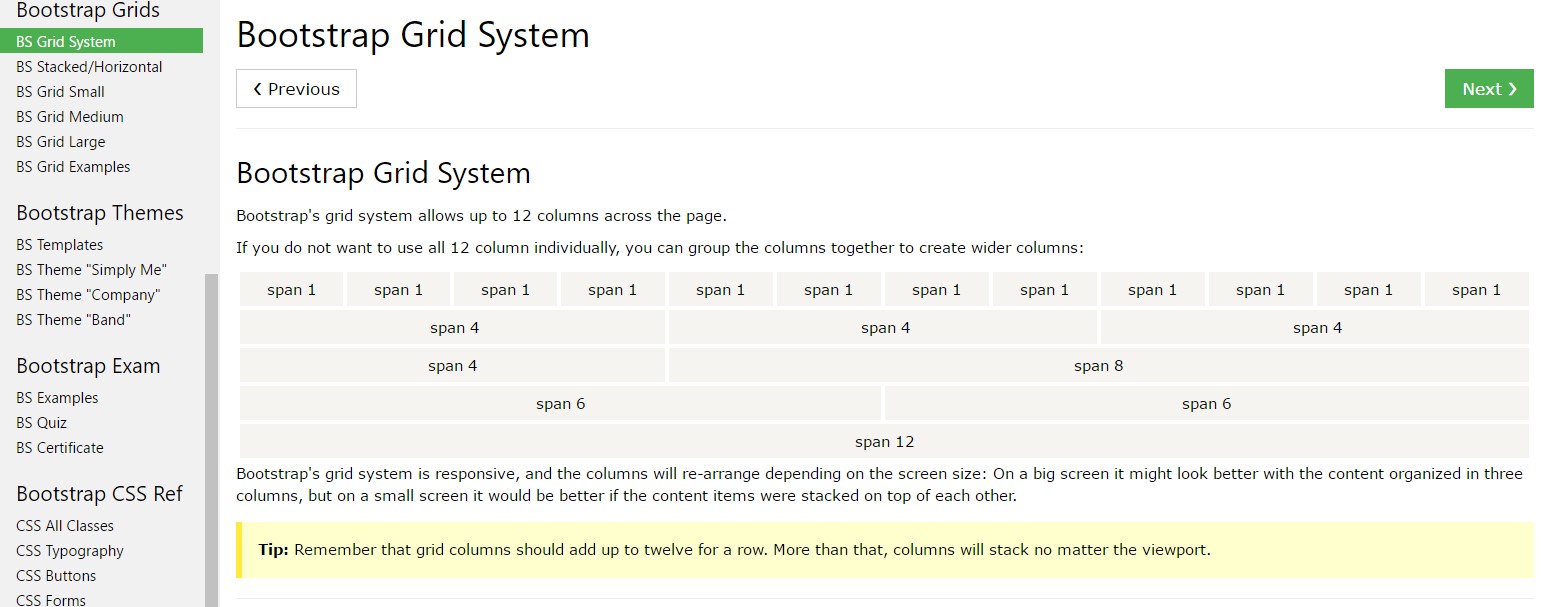
Among the most required part of the Bootstrap platform empowering us to produce responsive page interactively converting in order to always fit in the width of the display they get displayed on still looking beautifully is the so called grid system. The things it usually executes is delivering us the capability of building complicated designs integrating row plus a certain number of column components held in it. Just imagine that the viewable size of the screen is split up in twelve matching parts vertically.
The ways to use the Bootstrap grid:
Bootstrap Grid Panel utilizes a number of columns, containers, and rows to format and also fix web content. It's built by using flexbox and is entirely responsive. Listed here is an illustration and an in-depth review ways the grid comes together.

The above sample creates three equal-width columns on small, medium, large size, and extra sizable gadgets utilizing our predefined grid classes. Those columns are centralized in the webpage having the parent
.containerHere's in what way it operates:
- Containers deliver a method to center your web site's components. Work with
.container.container-fluid- Rows are horizontal groups of columns that make sure your columns are really aligned appropriately. We use the negative margin method regarding
.row- Web content should really be put within columns, also simply just columns can be immediate children of rows.
- Thanks to flexbox, grid columns without a set width is going to immediately format having equal widths. For example, four instances of
.col-sm- Column classes reveal the number of columns you 'd like to use from the potential 12 per row. { So, supposing that you want three equal-width columns, you are able to work with
.col-sm-4- Column
widths- Columns possess horizontal
paddingmarginpadding.no-gutters.row- There are 5 grid tiers, one for each responsive breakpoint: all breakpoints (extra small-sized), little, medium, large, and extra big.
- Grid tiers are built upon minimal widths, indicating they apply to that tier and all those above it (e.g.,
.col-sm-4- You are able to employ predefined grid classes as well as Sass mixins for more semantic markup.
Understand the issues plus errors about flexbox, such as the inability to work with several HTML components such as flex containers.
Appears to be pretty good? Great, why don't we go on to seeing all that in an instance. ( useful reference)
Bootstrap Grid HTML options
Generally the column classes are simply something like that
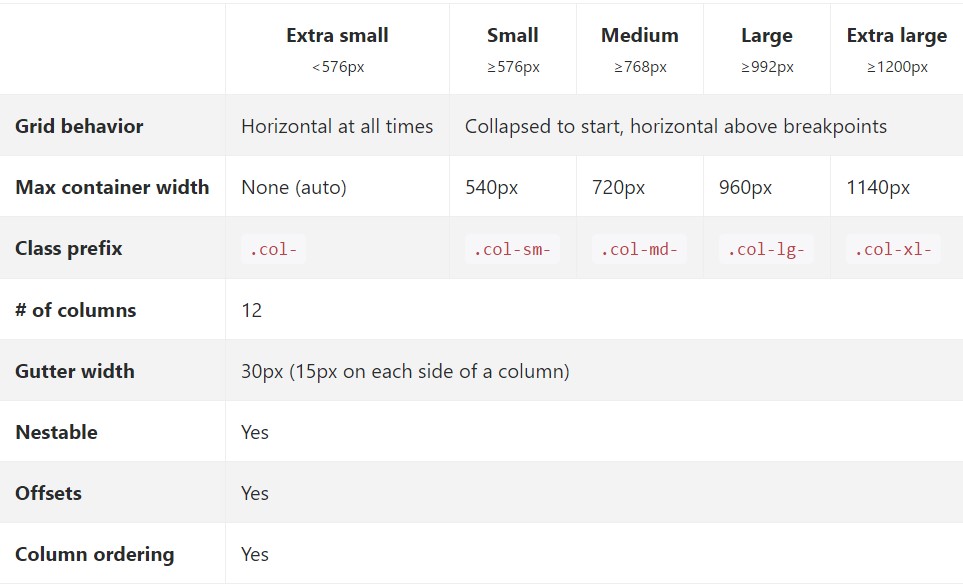
.col- ~ grid size-- two letters ~ - ~ width of the element in columns-- number from 1 to 12 ~.col-When it comes to the Bootstrap Grid CSS scales-- all the workable widths of the viewport ( or else the visible location on the display) have been actually parted to five ranges as comes next:
Extra small-- sizes under 544px or 34em (which appears to be the default measuring system around Bootstrap 4
.col-xs-*Small – 544px (34em) and over until 768px( 48em )
.col-sm-*Medium – 768px (48em ) and over until 992px ( 62em )
.col-md-*Large – 992px ( 62em ) and over until 1200px ( 75em )
.col-lg-*Extra large-- 1200px (75em) and everything wider than it
.col-xl-*While Bootstrap employs
emrempxView how elements of the Bootstrap grid system do a job across various tools along with a helpful table.
The several and new from Bootstrap 3 here is one extra width range-- 34em-- 48em being actually assigned to the
xsAll the aspects styled along with a particular viewport width and columns maintain its size in width when it comes to this viewport plus all above it. Anytime the width of the screen goes below the defined viewport size the elements stack above one another filling up the entire width of the view .
You may as well assign an offset to an aspect by a determined quantity of columns in a specified screen size and over this is performed with the classes
.offset- ~ size ~ - ~ columns ~.offset-lg-3.col- ~ size ~-offset- ~ columns ~A couple of things to consider when designing the markup-- the grids containing columns and rows really should be set within a
.container.container.container-fluidDirect heirs of the containers are the
.rowAuto style columns
Use breakpoint-specific column classes for equal-width columns. Bring in any range of unit-less classes for each breakpoint you require and each and every column will certainly be the same width.
Identical width
For example, here are two grid designs that placed on each gadget and viewport, from
xs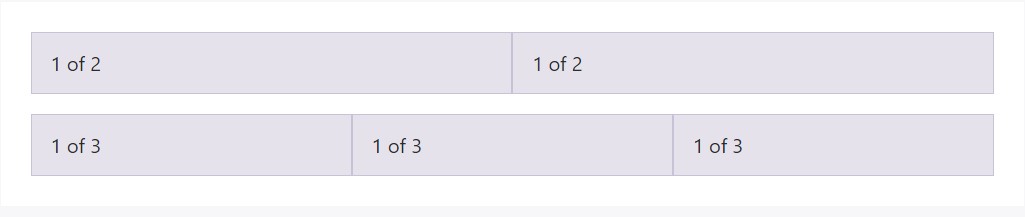
<div class="container">
  <div class="row">
    <div class="col">
      1 of 2
    </div>
    <div class="col">
      1 of 2
    </div>
  </div>
  <div class="row">
    <div class="col">
      1 of 3
    </div>
    <div class="col">
      1 of 3
    </div>
    <div class="col">
      1 of 3
    </div>
  </div>
</div>
Establishing one column size
Auto-layout for the flexbox grid columns likewise indicates you are able to put the width of one column and the others will promptly resize about it. You may possibly utilize predefined grid classes (as presented here), grid mixins, or possibly inline widths. Keep in mind that the other types of columns will resize despite the width of the center column.
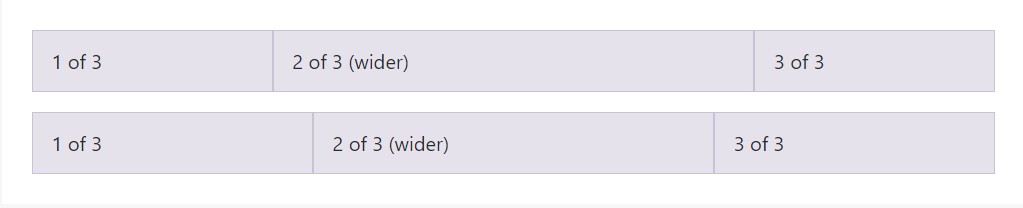
<div class="container">
  <div class="row">
    <div class="col">
      1 of 3
    </div>
    <div class="col-6">
      2 of 3 (wider)
    </div>
    <div class="col">
      3 of 3
    </div>
  </div>
  <div class="row">
    <div class="col">
      1 of 3
    </div>
    <div class="col-5">
      2 of 3 (wider)
    </div>
    <div class="col">
      3 of 3
    </div>
  </div>
</div>
Variable size web content
Using the
col- breakpoint -auto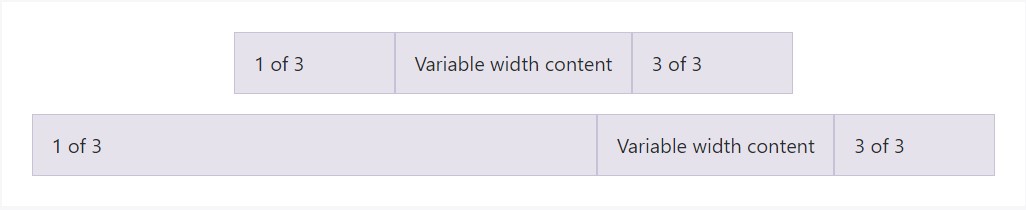
<div class="container">
  <div class="row justify-content-md-center">
    <div class="col col-lg-2">
      1 of 3
    </div>
    <div class="col-12 col-md-auto">
      Variable width content
    </div>
    <div class="col col-lg-2">
      3 of 3
    </div>
  </div>
  <div class="row">
    <div class="col">
      1 of 3
    </div>
    <div class="col-12 col-md-auto">
      Variable width content
    </div>
    <div class="col col-lg-2">
      3 of 3
    </div>
  </div>
</div>
Equivalent width multi-row
Establish equal-width columns that span multiple rows with including a
.w-100.w-100
<div class="row">
  <div class="col">col</div>
  <div class="col">col</div>
  <div class="w-100"></div>
  <div class="col">col</div>
  <div class="col">col</div>
</div>
Responsive classes
Bootstrap's grid consists of five tiers of predefined classes to get building complex responsive layouts. Customize the size of your columns upon extra small, small, medium, large, or else extra large gadgets however you want.
All breakpoints
Intended for grids that are the very same from the smallest of devices to the largest sized, employ the
.col.col-*.col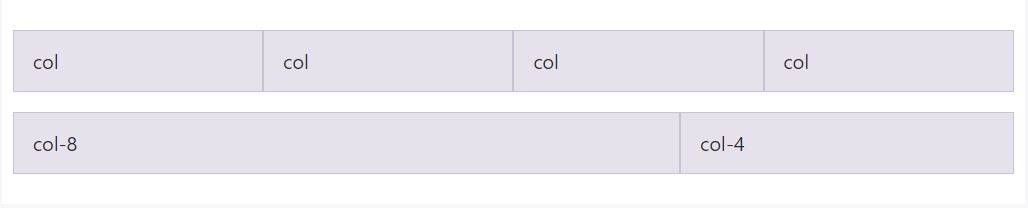
<div class="row">
  <div class="col">col</div>
  <div class="col">col</div>
  <div class="col">col</div>
  <div class="col">col</div>
</div>
<div class="row">
  <div class="col-8">col-8</div>
  <div class="col-4">col-4</div>
</div>
Loaded to horizontal
Using a particular set of
.col-sm-*
<div class="row">
  <div class="col-sm-8">col-sm-8</div>
  <div class="col-sm-4">col-sm-4</div>
</div>
<div class="row">
  <div class="col-sm">col-sm</div>
  <div class="col-sm">col-sm</div>
  <div class="col-sm">col-sm</div>
</div>
Mix up and fit
Really don't like your columns to just pile in several grid tiers? Employ a mix of separate classes for each and every tier as needed. Observe the situation below for a more effective idea of precisely how everything functions.
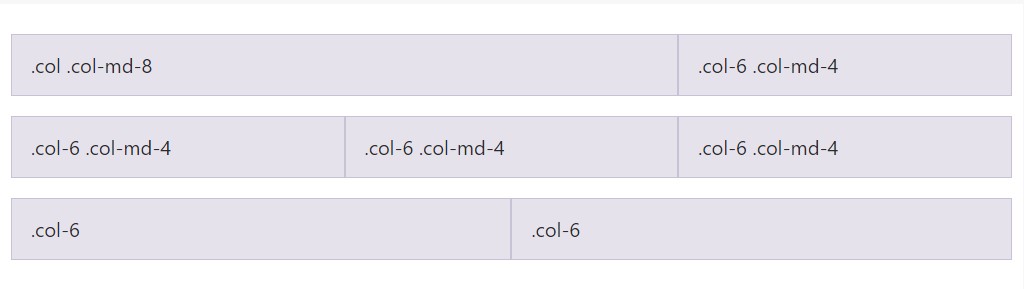
<div class="row">
  <div class="col col-md-8">.col .col-md-8</div>
  <div class="col-6 col-md-4">.col-6 .col-md-4</div>
</div>

<!-- Columns start at 50% wide on mobile and bump up to 33.3% wide on desktop -->
<div class="row">
  <div class="col-6 col-md-4">.col-6 .col-md-4</div>
  <div class="col-6 col-md-4">.col-6 .col-md-4</div>
  <div class="col-6 col-md-4">.col-6 .col-md-4</div>
</div>

<!-- Columns are always 50% wide, on mobile and desktop -->
<div class="row">
  <div class="col-6">.col-6</div>
  <div class="col-6">.col-6</div>
</div>
Placement
Employ flexbox alignment utilities to vertically and horizontally straighten columns. ( learn more here)
Vertical alignment
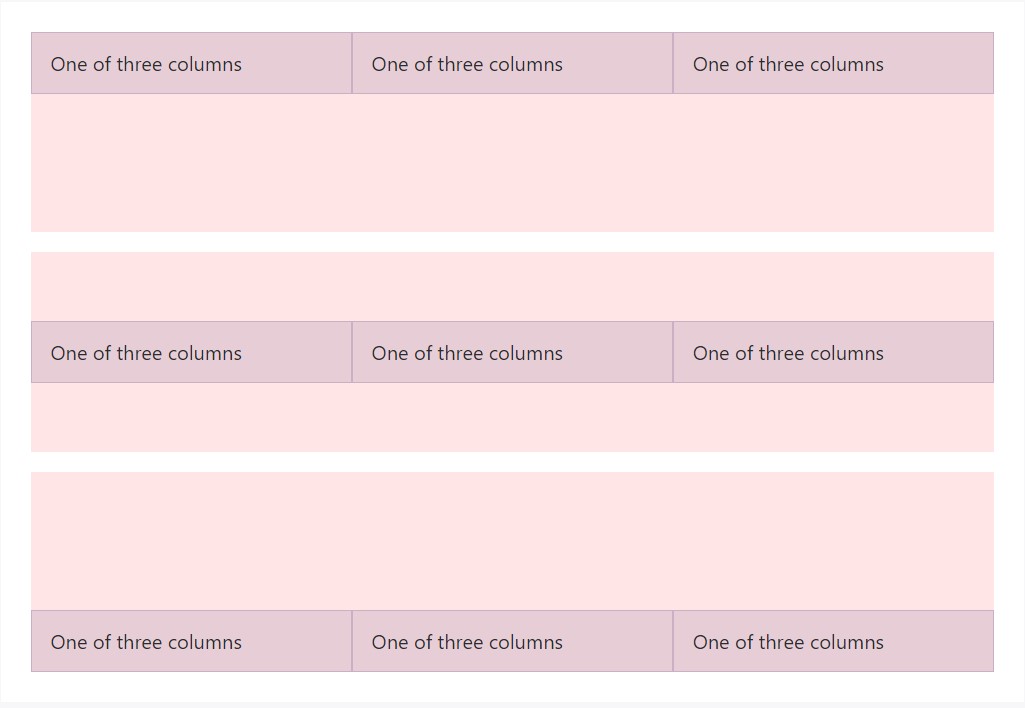
<div class="container">
  <div class="row align-items-start">
    <div class="col">
      One of three columns
    </div>
    <div class="col">
      One of three columns
    </div>
    <div class="col">
      One of three columns
    </div>
  </div>
  <div class="row align-items-center">
    <div class="col">
      One of three columns
    </div>
    <div class="col">
      One of three columns
    </div>
    <div class="col">
      One of three columns
    </div>
  </div>
  <div class="row align-items-end">
    <div class="col">
      One of three columns
    </div>
    <div class="col">
      One of three columns
    </div>
    <div class="col">
      One of three columns
    </div>
  </div>
</div>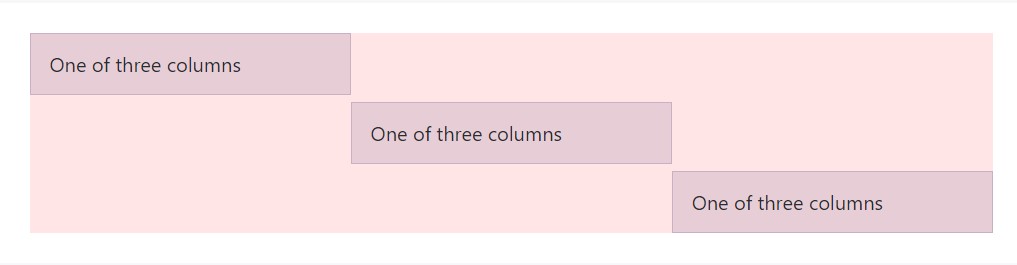
<div class="container">
  <div class="row">
    <div class="col align-self-start">
      One of three columns
    </div>
    <div class="col align-self-center">
      One of three columns
    </div>
    <div class="col align-self-end">
      One of three columns
    </div>
  </div>
</div>
Horizontal arrangement
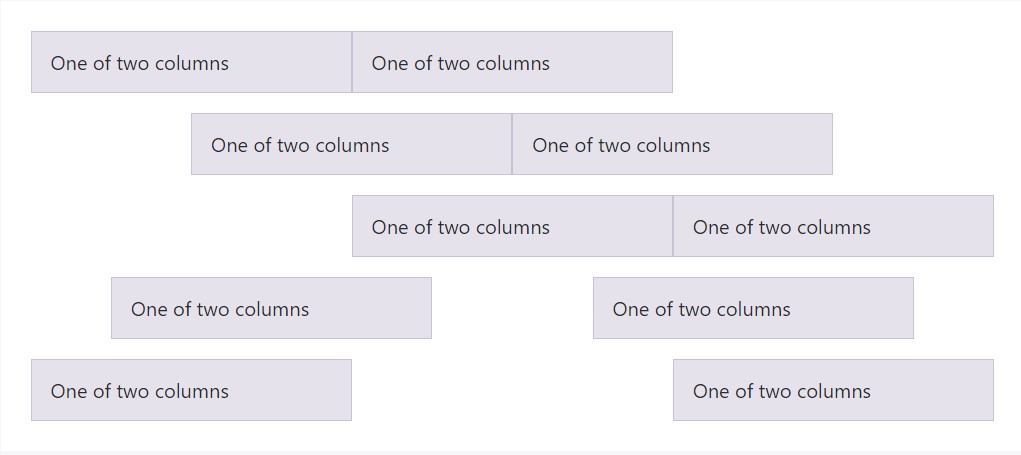
<div class="container">
  <div class="row justify-content-start">
    <div class="col-4">
      One of two columns
    </div>
    <div class="col-4">
      One of two columns
    </div>
  </div>
  <div class="row justify-content-center">
    <div class="col-4">
      One of two columns
    </div>
    <div class="col-4">
      One of two columns
    </div>
  </div>
  <div class="row justify-content-end">
    <div class="col-4">
      One of two columns
    </div>
    <div class="col-4">
      One of two columns
    </div>
  </div>
  <div class="row justify-content-around">
    <div class="col-4">
      One of two columns
    </div>
    <div class="col-4">
      One of two columns
    </div>
  </div>
  <div class="row justify-content-between">
    <div class="col-4">
      One of two columns
    </div>
    <div class="col-4">
      One of two columns
    </div>
  </div>
</div>
No margins
The gutters around columns in our predefined grid classes may possibly be gotten rid of with
.no-guttersmargin.rowpaddingHere is actually the source code for generating such designs. Bear in mind that column overrides are scoped to just the original children columns and are focused by means of attribute selector. Although this creates a more certain selector, column padding have the ability to still be further modified with space utilities.
.no-gutters
  margin-right: 0;
  margin-left: 0;

  > .col,
  > [class*="col-"]
    padding-right: 0;
    padding-left: 0;
In practice, here's how it looks like. Note you have the ability to constantly apply this with all of the other predefined grid classes ( involving column widths, responsive tiers, reorders, and much more ).

<div class="row no-gutters">
<div class="col-12 col-sm-6 col-md-8">.col-12 .col-sm-6 .col-md-8</div>
<div class="col-6 col-md-4">.col-6 .col-md-4</div>
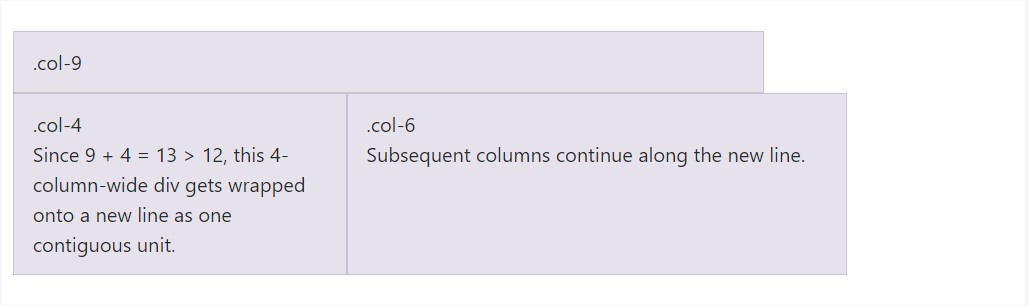
</div>Column wrap
In the case that more than 12 columns are set inside a single row, each set of extra columns will, as being one unit, wrap onto a new line.
<div class="row">
  <div class="col-9">.col-9</div>
  <div class="col-4">.col-4<br>Since 9 + 4 = 13 > 12, this 4-column-wide div gets wrapped onto a new line as one contiguous unit.</div>
  <div class="col-6">.col-6<br>Subsequent columns continue along the new line.</div>
</div>
Reseting of the columns
Along with the number of grid tiers offered, you are actually expecteded to run into concerns where, at particular breakpoints, your columns don't clear pretty suitable as one is taller in comparison to the various other. To fix that, employ a combo of a
.clearfix
<div class="row">
<div class="col-6 col-sm-3">.col-6 .col-sm-3</div>
<div class="col-6 col-sm-3">.col-6 .col-sm-3</div>
<!-- Add the extra clearfix for only the required viewport -->
<div class="clearfix hidden-sm-up"></div>
<div class="col-6 col-sm-3">.col-6 .col-sm-3</div>
<div class="col-6 col-sm-3">.col-6 .col-sm-3</div>
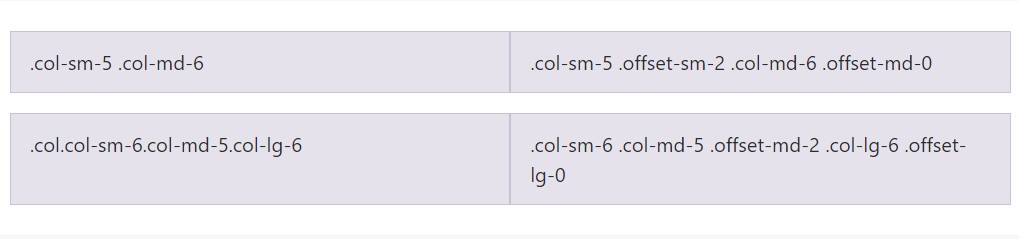
</div>As well as column cleaning at responsive breakpoints, you may perhaps will want to reset offsets, pushes, and pulls. Notice this in action in the grid scenario.
<div class="row">
  <div class="col-sm-5 col-md-6">.col-sm-5 .col-md-6</div>
  <div class="col-sm-5 offset-sm-2 col-md-6 offset-md-0">.col-sm-5 .offset-sm-2 .col-md-6 .offset-md-0</div>
</div>

<div class="row">
  <div class="col-sm-6 col-md-5 col-lg-6">.col.col-sm-6.col-md-5.col-lg-6</div>
  <div class="col-sm-6 col-md-5 offset-md-2 col-lg-6 offset-lg-0">.col-sm-6 .col-md-5 .offset-md-2 .col-lg-6 .offset-lg-0</div>
</div>
Re-ordering
Flex order
Utilize flexbox utilities for handling the visible setup of your content.

<div class="container">
  <div class="row">
    <div class="col flex-unordered">
      First, but unordered
    </div>
    <div class="col flex-last">
      Second, but last
    </div>
    <div class="col flex-first">
      Third, but first
    </div>
  </div>
</div>
Offsetting columns
Relocate columns to the right utilizing
.offset-md-**.offset-md-4.col-md-4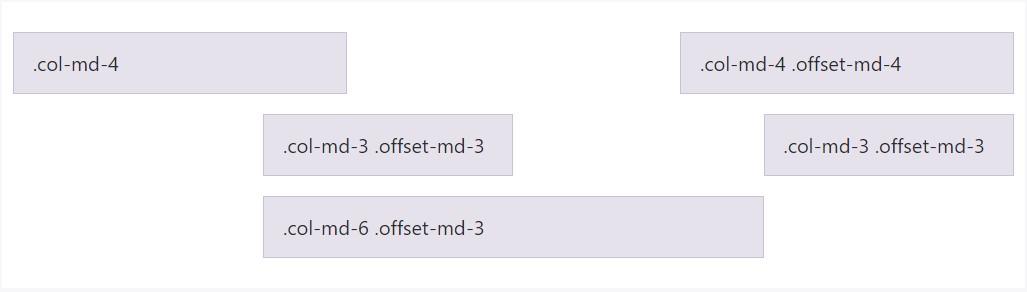
<div class="row">
  <div class="col-md-4">.col-md-4</div>
  <div class="col-md-4 offset-md-4">.col-md-4 .offset-md-4</div>
</div>
<div class="row">
  <div class="col-md-3 offset-md-3">.col-md-3 .offset-md-3</div>
  <div class="col-md-3 offset-md-3">.col-md-3 .offset-md-3</div>
</div>
<div class="row">
  <div class="col-md-6 offset-md-3">.col-md-6 .offset-md-3</div>
</div>
Pushing and pulling
Efficiently transform the ordination of our inbuilt grid columns with
.push-md-*.pull-md-*
<div class="row">
  <div class="col-md-9 push-md-3">.col-md-9 .push-md-3</div>
  <div class="col-md-3 pull-md-9">.col-md-3 .pull-md-9</div>
</div>
Information positioning
To den your content along with the default grid, bring in a brand new
.row.col-sm-*.col-sm-*
<div class="row">
  <div class="col-sm-9">
    Level 1: .col-sm-9
    <div class="row">
      <div class="col-8 col-sm-6">
        Level 2: .col-8 .col-sm-6
      </div>
      <div class="col-4 col-sm-6">
        Level 2: .col-4 .col-sm-6
      </div>
    </div>
  </div>
</div>
Utilizing Bootstrap's origin Sass files
Once using Bootstrap's origin Sass data, you have the alternative of employing Sass variables and mixins to set up customized, semantic, and responsive webpage designs. Our predefined grid classes operate these exact same variables and mixins to provide a whole suite of ready-to-use classes for fast responsive layouts .
Features
Maps and variables establish the quantity of columns, the gutter width, and the media query aspect. We utilize these to generate the predefined grid classes detailed just above, as well as for the custom-made mixins listed below.
$grid-columns:      12;
$grid-gutter-width-base: 30px;

$grid-gutter-widths: (
  xs: $grid-gutter-width-base, // 30px
  sm: $grid-gutter-width-base, // 30px
  md: $grid-gutter-width-base, // 30px
  lg: $grid-gutter-width-base, // 30px
  xl: $grid-gutter-width-base  // 30px
)

$grid-breakpoints: (
  // Extra small screen / phone
  xs: 0,
  // Small screen / phone
  sm: 576px,
  // Medium screen / tablet
  md: 768px,
  // Large screen / desktop
  lg: 992px,
  // Extra large screen / wide desktop
  xl: 1200px
);

$container-max-widths: (
  sm: 540px,
  md: 720px,
  lg: 960px,
  xl: 1140px
);
Mixins
Mixins are used together with the grid variables to develop semantic CSS for specific grid columns.
@mixin make-row($gutters: $grid-gutter-widths)
  display: flex;
  flex-wrap: wrap;

  @each $breakpoint in map-keys($gutters)
    @include media-breakpoint-up($breakpoint)
      $gutter: map-get($gutters, $breakpoint);
      margin-right: ($gutter / -2);
      margin-left:  ($gutter / -2);


// Make the element grid-ready (applying everything but the width)
@mixin make-col-ready($gutters: $grid-gutter-widths)
  position: relative;
  // Prevent columns from becoming too narrow when at smaller grid tiers by
  // always setting `width: 100%;`. This works because we use `flex` values
  // later on to override this initial width.
  width: 100%;
  min-height: 1px; // Prevent collapsing

  @each $breakpoint in map-keys($gutters)
    @include media-breakpoint-up($breakpoint)
      $gutter: map-get($gutters, $breakpoint);
      padding-right: ($gutter / 2);
      padding-left:  ($gutter / 2);


@mixin make-col($size, $columns: $grid-columns)
  flex: 0 0 percentage($size / $columns);
  width: percentage($size / $columns);
  // Add a `max-width` to ensure content within each column does not blow out
  // the width of the column. Applies to IE10+ and Firefox. Chrome and Safari
  // do not appear to require this.
  max-width: percentage($size / $columns);


// Get fancy by offsetting, or changing the sort order
@mixin make-col-offset($size, $columns: $grid-columns)
  margin-left: percentage($size / $columns);


@mixin make-col-push($size, $columns: $grid-columns)
  left: if($size > 0, percentage($size / $columns), auto);


@mixin make-col-pull($size, $columns: $grid-columns)
  right: if($size > 0, percentage($size / $columns), auto);
Example utilization
You can easily customize the variables to your personal customized values, or else simply use the mixins with their default values. Here is actually an instance of utilizing the default settings to build a two-column design having a divide in between.
View it practical in this particular rendered good example.
.container
  max-width: 60em;
  @include make-container();

.row
  @include make-row();

.content-main
  @include make-col-ready();

  @media (max-width: 32em)
    @include make-col(6);

  @media (min-width: 32.1em)
    @include make-col(8);


.content-secondary
  @include make-col-ready();

  @media (max-width: 32em)
    @include make-col(6);

  @media (min-width: 32.1em)
    @include make-col(4);
<div class="container">
<div class="row">
<div class="content-main">...</div>
<div class="content-secondary">...</div>
</div>
</div>Personalizing the grid
Employing our built-in grid Sass maps and variables , it is certainly attainable to completely modify the predefined grid classes. Switch the number of tiers, the media query dimensions, and also the container sizes-- and then recompile.
Gutters and columns
The amount of grid columns and also their horizontal padding (aka, gutters) can be customized by means of Sass variables.
$grid-columns$grid-gutter-widthspadding-leftpadding-right$grid-columns: 12 !default;
$grid-gutter-width-base: 30px !default;
$grid-gutter-widths: (
xs: $grid-gutter-width-base,
sm: $grid-gutter-width-base,
md: $grid-gutter-width-base,
lg: $grid-gutter-width-base,
xl: $grid-gutter-width-base
) !default;Capabilities of grids
Going beyond the columns themselves, you may as well customise the amount of grid tiers. In the event that you required just three grid tiers, you 'd modify the
$ grid-breakpoints$ container-max-widths$grid-breakpoints: (
sm: 480px,
md: 768px,
lg: 1024px
);
$container-max-widths: (
sm: 420px,
md: 720px,
lg: 960px
);When producing any kind of changes to the Sass maps or variables , you'll have to save your adjustments and recompile. Doing this will out a new set of predefined grid classes for column widths, offsets, pushes, and pulls. Responsive visibility utilities are going to likewise be upgraded to use the custom breakpoints.
Final thoughts
These are really the simple column grids in the framework. Utilizing particular classes we can easily tell the special features to span a determined quantity of columns basing on the definite width in pixels of the viewable space where the web page becomes shown. And given that there are a a number of classes identifying the column width of the components instead of viewing everyone it is definitely much better to try to understand ways in which they certainly get designed-- it's very convenient to remember featuring simply a handful of things in mind.
Review a few youtube video short training relating to Bootstrap grid
Related topics:
Bootstrap grid approved documents
W3schools:Bootstrap grid short training
Bootstrap Grid column
